Tutorial 4 - Using Perception Task data
In this tutorial you will learn how to read out the data of a Perception Task that is received by RoboKudo.
The Perception Task is first received by the Annotator called QueryAnnotator.
In this case, it is included in the base_tree.
It is then shared with the other annotators through the CAS.
The CAS object offers a get() function to get so called views from it.
They contain scene-level information like the sensor data, scene-level annotations or also the
Query/Perception Task associated with the current CAS.
The get() function takes in a value from the constants in the CASView class as a parameter.
By passing the constant CASViews.QUERY to the get() function,
we can retrieve the current Perception Task.
All possible CASView values can be found in src/robokudo/cas.py.
The query attributes can be accessed through the dot-notation.
An example would be cas.get(CASViews.QUERY).obj.location. This means when
typing something into the obj form into the location field in the query
interface, it will be written to obj.location.
Task 4-1: Open the annotator
size_filter.pyand implement itsupdate()function to fulfill the following requirements:Read out the
CASViews.COLOR_IMAGEview from the CAS and store it in a local variable calledvis_imgas a deep-copy withcopy.deepcopy().Read out the Perception Task from the CAS and get its value
obj.size. The possible values should be one of["small", "medium", "large", None]whereNonemeans that nothing should be filtered.For each
ObjectHypothesisin the CAS, analyze their annotations. FetchSizeannotations on it and check theirclsattribute. If its value is the same as in the query data, call theadd_to_image()function and pass theObjectHypothesisannotation and the previously storedCOLOR_IMAGEto it.
In the previous task you stored the CASViews.COLOR_IMAGE into a variable. This
view contains the input image provided to RoboKudo and is for example used to add
the rectangles around objects as could be seen with the ClusterColorAnnotator
in Tutorial 2. Generally the cv2 library is used to work with this kind of image and
for the following task you will need the cv2.rectangle() and cv2.putText() functions:
cv2.rectangle(img=image, pt1=(x1, y1), pt2=(x2, y2),
              color=(0, 0, 255), thickness=2
)
cv2.putText(img=image, text=text, org=(x, y),
            font=cv2.FONT_HERSHEY_COMPLEX, fontScale=0.5,
            color=(255, 255, 255), thickness=1, lineType=2
)
Task 4-2: Implement the
add_to_image()function to fulfill the following requirements:Add a rectangle to that image by using the annotation/
ObjectHypothesisparameter with itsroicoordinates.Add a text to the image with the text content of
annotation.id.Return the image from the function.
In the
update()function of the Annotator, store the result of theadd_to_image()call into thevis_imgvariable.
Now the vis_img variable gets additional rectangles for each annotation
matching the requested size value in the query. There is only one piece missing now,
as we want the annotator to provide the image you just created as an visual output.
To do so you can use the get_annotator_output_struct() function
of the annotator. This returns an object of type AnnotatorOutputStruct which
then again offers a function called set_image(). This function takes in an image
and stores it in the correct output for the annotator. It only has to be
called once at the end of the update() function.
Task 4-3: In the
update()function add the following functionality right before returning:Get the
AnnotatorOutputStructof the current annotator.Use the
set_image()function to add thevis_imgto the annotator’s visual output.
Now you can try out the new query parameter. Add the FilterSize annotator to
the PPT and restart RoboKudo. Send a query to RoboKudo with obj.size="small" and
view the output of the newly added annotator to see if the annotation is
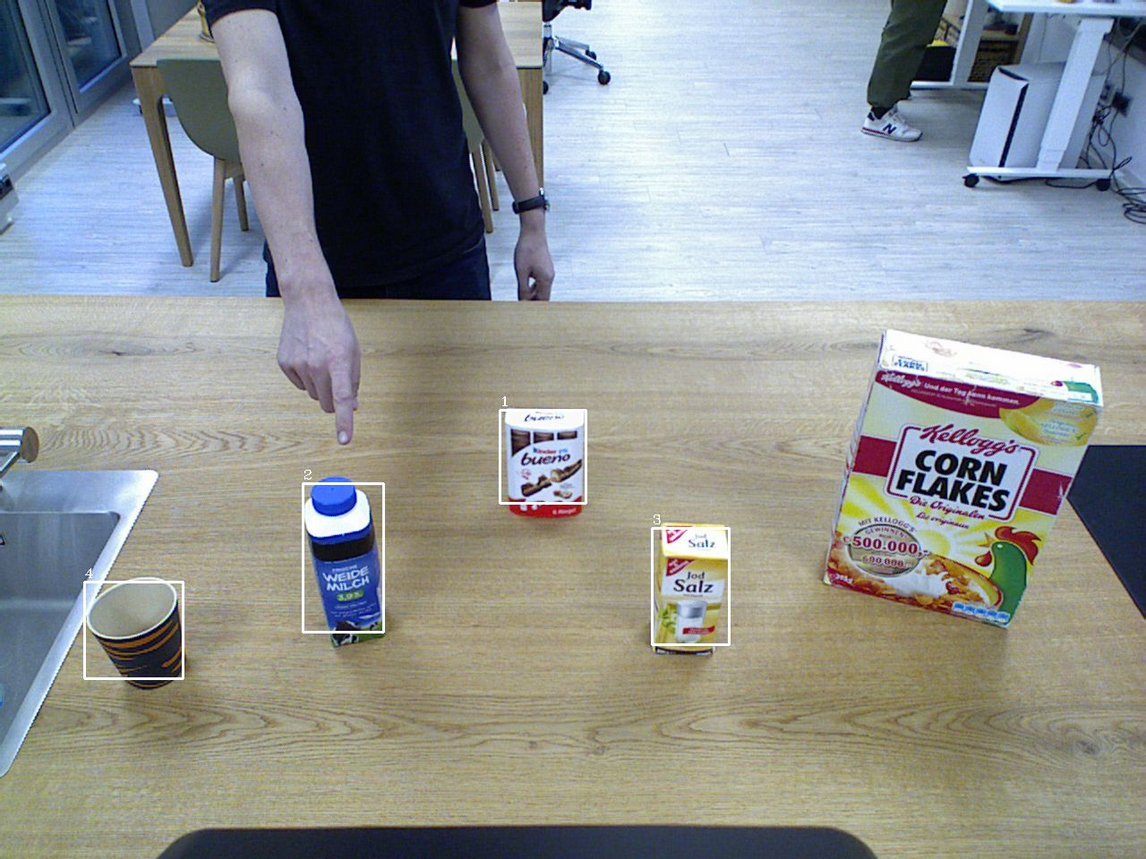
correctly filtered and the rectangle is added correctly. The output should look
something like this:
 Please note that the object on the right is filtered out, because it’s a large object.
Task 4-4: Send another query with
obj.size="large"and see how the output image changes
Important
Add the SizeFilterAnnotator after the ObjectSizeAnnotator so that the
size annotations are available in the CAS.
object_detection.add_children(
    [
        # ...
        ObjectSizeAnnotator(),
        SizeFilterAnnotator(),
        # ...
    ]
)
Now that the filter for size is working, we will add filter functionality for the color too. This way we will be able to find an object by both size and color.
Task 4-5: Add color filtering functionality to the
SizeFilterAnnotatorThe bounding box should only be added if both the size and color match the query
Tip
The query.obj.color field is of type List[str]
Task 4-6: Try to find only the milk carton by using the size and color annotations.
The final code of the size_filter.py annotator could look like this:
class SizeFilterAnnotator(robokudo.annotators.core.BaseAnnotator):

    def __init__(self, name="SizeFilterAnnotator") -> None:
        super().__init__(name=name)
        self.rk_logger.debug("%s.__init__()" % self.__class__.__name__)

    def update(self) -> py_trees.common.Status:
        # Read the query from the CAS
        query = self.get_cas().get(CASViews.QUERY)

        # Get all ObjectHypothesis annotations from the CAS
        annotations = self.get_cas().filter_annotations_by_type(robokudo.types.scene.ObjectHypothesis)

        # Read out the input color image and create a copy
        visualization_img = copy.deepcopy(self.get_cas().get(CASViews.COLOR_IMAGE))

        for annotation in annotations:
            # For each annotation check whether its Size and color annotations
            # match the query. If they do add a bounding box for the annotation
            # to the output image.
            match_color = False
            match_size = False
            for oh in annotation.annotations:
                if not match_size and isinstance(oh, robokudo.types.annotation.Size):
                    match_size = query.obj.size == oh.cls
                elif (not match_size and len(query.obj.color) > 0
                    and isinstance(oh, robokudo.types.annotation.SemanticColor)):
                    match_color = query.obj.color[0] == oh.color
                if match_color and match_size:
                    visualization_img = self.add_to_image(annotation, visualization_img)
                    break


        # Write the final image containing the newly created rectangles to the
        # annotator output
        self.get_annotator_output_struct().set_image(visualization_img)
        return py_trees.Status.SUCCESS

    def add_to_image(self, annotation: robokudo.types.core.Annotation, image: Any) -> Any:
        upper_left = (annotation.roi.roi.pos.x, annotation.roi.roi.pos.y)
        upper_left_text = (annotation.roi.roi.pos.x, annotation.roi.roi.pos.y - 5)

        # Put the annotation id in the upper left of the rectangle
        visualization_img = cv2.putText(image, f"{annotation.id}",
                                        upper_left_text, font, 0.5, (255, 255, 255), 1, 2)

        # Create a rectangle with the annotations roi data
        visualization_img = cv2.rectangle(visualization_img, upper_left,
                                          (annotation.roi.roi.pos.x + annotation.roi.roi.width,
                                           annotation.roi.roi.pos.y + annotation.roi.roi.height),
                                          (255, 255, 255), 2)
        return visualization_img